
With your iPhone, you can record the screen activity at any time because the feature is inbuilt. If you engage in screen-based activities, it doesn’t matter whether you’re surfing the internet, making a video call, playing a game, or doing something else.
We have discussed how to screen record on iPhone 13. iPhone 13 has a built-in screen recording system that allows you to record your screen along with the audio which is optional.
Nevertheless, before using this feature, you must first determine whether the Screen Recording feature has already been enabled in the Control Center. Whether it’s there or not doesn’t matter. Using the main screen allows you to start a recording immediately.
It must be added first if it is not. There are a few straightforward steps to add this feature.
Step 1:
- Find the Control Center by going to the “Settings” tab and scrolling down.
- Then click “Customize Controls.”
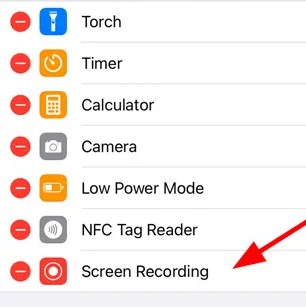
- From the customize interface, locate the “Screen Recording” and click the + icon.
- The Control Center will now include the recording feature.
Step 2:
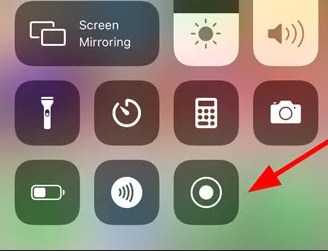
To record, you simply need to raise the Control Center and begin the process whenever you choose.
When using an iPhone 8 or earlier, you can do this by swiping up to pull the Control Center menu up.
In contrast, you must pull down the menu from the top-right corner of your iPhone X or later to access the settings menu.
Step 3:
Screen recording can be done by tapping “Screen Recording” and then selecting “Start Recording.”
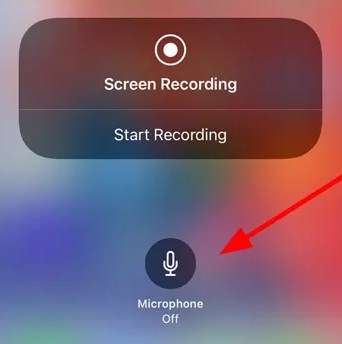
The iPhone’s screen will be recorded when you tap this. Turn on the Microphone if you wish to capture your audio or the background noise. Under the screen recording, you will find it.
Step 4:
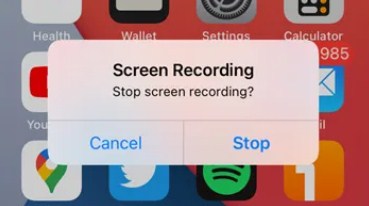
Tap the red status bar followed by “Stop” to stop recording when you are done with the recording.
There is one on the iPhone’s screen at the top. If you go back to the Control Center and tap the record icon, the recording will end.
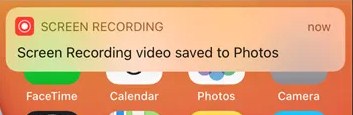
Upon stopping a screen recording, the recording will automatically be saved to the “Photos” app.
The album can be opened, edited, or shared, or other operations can be performed by going to the Photos section.
What you need to understand about recording your screen on the iPhone 13 and 13 Pro
Play a game or do something cool with your new iPhone if you want to show off how well it can do.
Hence, you might want to utilize the screen recording feature, which is not widely known.
It allows you to record whatever is happening on your phone and save it to your device’s Photos section.
You can edit the footage as needed to upload it to social media or save it to your computer to share or listen to later.
The steps are as follows:
- To access the Control Center, go to Settings.
- There should be a green plus icon next to Screen Recording. Simply click it.
- There is no need for you to do anything else if there is a red minus button.
- Your screen will be recorded once you open the app.
- Bring up your control center by tapping the top right corner of the screen and scrolling down.
- An animated countdown timer will be displayed when you click the Screen Record icon. Your phone will start recording your screen in three seconds.
- Continue following the previous steps and click the button again to stop recording.
- Once you save a recording, it will be in your files and photos, so you can use the recording as you wish.
Apple iPhone 13 Pro Max: How to Record the Screen
Making a video with the screen of your mobile/cell phone Apple iPhone 13 and adding sound can be very helpful for performing tutorials or teaching other people how to use certain features in an Apple iPhone 13, which can be saved as a video file and then sent or uploaded to websites such as YouTube.
For example, we may want to make a video with sound to keep as a souvenir or proof. We might also record a TikTok video about something we have seen on Instagram, over the phone, or during a video call with a family member.
Following are the Steps to make a Recording on an Apple iPhone 13:
Step 1:
As a first step, we need to verify that we already have screen recording enabled on our iPhone 13. If we already do, we can move on to point 5. Our Apple iPhone 13 allows us to check this by going to the Settings app, and we look for the gear icon.

Step 2:
We click on the “Control Center” link at the bottom left-hand menu to customize the controls.

Step 3:
In the “INCLUDE” section of our iPhone 13, the screen recording control will appear in the first list if we already have it enabled.
To arrange it in a different order, click on the three horizontal lines to the right of the control and drag it up or down.
A simple click on the red button on the left can remove the control as well.

Step 4:
Click on the green plus button Add to panel icon if the activated control does not appear. If it does not appear, go down and click on “MORE CONTROLS.”
We can now exit the Apple iPhone 13 settings once this step is complete.
Step 5:
Swipe from the bottom up from the screen where you want the video to start (iPhone 7 and lower, iPad with iOS 11 or earlier).
You can begin the video with a swipe from the upper right corner of the screen (iPhone X, iPad with iOS 12, or iPadOS).
Step 6:
How to record a video without using the Microphone on the Apple iPhone 13
- By pressing the recording icon, you can record
- Three seconds will be counted down.
- Once the recording has begun,
- The top of the screen will have a red line.
- Everything happening on the screen is being recorded as well as the word “Recording.”
In addition to recording your voice and the sounds of the iPhone 13, you can also use the Microphone.
When discussing the operation of an app with an acquaintance, for example, or recording a short message while filming the Apple iPhone 13 screen, this can be useful.
- Hold down the Record screen button.
- You can activate or deactivate the Microphone by pressing on it
- When you click on “Start recording,” a countdown of three seconds will begin, followed by the recording.
Step 7:
This tutorial shows you how to stop recording by opening the Control Center (Point 5).
- You can stop recording by pressing the stop button on the Recording screen icon.
- If you prefer, you can press the stop button in the status bar at the top of the screen.
Step 8:
The screen recording video is saved to “Photos” instead of the Camera Roll once your Apple iPhone 13 screen is turned on.
Go to the Photos application on your Apple iPhone 13, where you will find your video recording in the last position to view and share.
Due to its internal memory of 128 GB, 256 GB, and 512 GB, your iPhone 13 allows you to store screen recordings in video format.
Final Words:
We have discussed how to screen record on iPhone 13. iPhone 13 has a built-in screen recording system that allows you to record your screen along with the audio which is optional.
Hope you like Our article about how to screen record on iPhone 13: if you still have some questions or queries about how to turn on screen recording on iPhone 13, mention those in the comment section.
Comments
Post a Comment